How to Make Homemade Butter, Cheese, and Dairy Products at Home
Picture this: it’s a crisp autumn morning, and you’re standing in your cozy kitchen, the scent of fresh cream filling the air as you churn your own butter. That’s the magic I’ve discovered over my eight years as a tradwife, turning simple dairy into something special that nourishes my family and connects us to those old-fashioned ways. If you’re here because you’re curious about making homemade butter, cheese, or other dairy delights, I’ll walk you through it step by step, sharing tips that make it easy and rewarding.
Making your own dairy products at home is simpler than you think. With just heavy cream and a jar, you can create fresh butter in about 15 minutes. Ricotta cheese requires only milk, lemon juice, and cheesecloth. These traditional skills give you control over what your family eats while connecting you to generations of homemakers who nourished their loved ones from scratch.
I’ve always said that making butter at home is like capturing a bit of that farm charm right in your own space. You don’t need fancy equipment—just heavy cream, a jar, and some elbow grease, though I’ll admit my KitchenAid mixer has become a trusty sidekick on busier days.
Begin by pouring a pint of heavy cream into a clean mason jar. Secure the lid tightly. Now shake. Vigorously. For about 10 to 15 minutes, until the cream separates into butter and buttermilk. It’s a workout, sure, but think of it as building those homemaker muscles while creating something pure for your family.
The transformation surprises most women the first time. The cream thickens, then suddenly breaks. Pour off the buttermilk—save it for your next batch of pancakes—and rinse the butter under cold water to remove any lingering liquid. Knead in a pinch of sea salt if you like it flavored, or leave it plain for spreading on fresh bread.
One scenario that sticks with me: a woman from Texas posted about her first try during a summer heatwave. Her cream wouldn’t separate until she chilled everything in the fridge first. Lessons like that remind us to adapt to our environments and seasons.
Here’s what nobody tells you: homemade butter tastes worlds better than store-bought, with a freshness that elevates even the simplest toast. And it’s economical—buy cream on sale, and you’re set for weeks. Store it in the fridge in an airtight container, or freeze portions for longer keeping.
Why bother with homemade dairy in a modern world
Between you and me, in this fast-paced life, it’s tempting to grab everything from the grocery store. But crafting your own dairy products brings a sense of control and purity that’s hard to match. It’s about knowing exactly what’s in your food, especially when you source from local farmers markets where fresh, quality ingredients abound.
Women in our community often discuss the health benefits—fresher nutrients, no preservatives, and the ability to customize everything from salt levels to flavoring. One conversation I followed recently highlighted frustrations with commercial cheeses that lack depth. Homemade versions let you experiment, like adding herbs from your garden or adjusting cultures to your taste.
That said, it’s not just about nutrition. It’s empowering. Choosing to make these things affirms our role as nurturers, creating from scratch in ways that honor the traditional values many of us hold dear. There’s a quiet satisfaction in setting fresh butter on the table, knowing your hands shaped it.
Look, I’ve had days where the thought of another kitchen project feels overwhelming. But starting small, like with butter, builds confidence. Soon, you’re onto cheeses, yogurt, and other dairy creations, feeling that pride that comes from true homemaking.
Moving to cheese: ricotta and beyond
Ricotta is my go-to for beginners—it’s quick, forgiving, and uses ingredients you probably have on hand. Heat a gallon of whole milk in a heavy-bottomed pot until it reaches just below boiling, around 200 degrees Fahrenheit. Stir in a quarter cup of lemon juice or white vinegar, and watch the magic happen as curds begin to form.
Let it sit undisturbed for about five minutes. The curds will separate from the whey, creating that distinctive cloudy appearance. Then strain the mixture through cheesecloth set in a colander. The whey drains away, leaving soft, creamy ricotta perfect for lasagna, stuffed shells, or spreading on homemade bread with a drizzle of honey.
I’ll be honest, the first time I tried this, I over-stirred and ended up with a grainy texture. But practice makes perfect. Now, I make batches regularly, especially when I’m organizing my kitchen for the week ahead and planning meals.
What I’ve learned is to use the freshest milk possible. If you have access to local dairy farms, it makes a noticeable difference in flavor and texture. For those just starting, regular pasteurized milk works fine—don’t let perfectionism hold you back from trying.
A real-life moment: imagine a new tradwife, overwhelmed by her first holiday preparations, deciding to make ricotta for a family recipe. It turned out lumpier than expected, but her husband raved about the effort and the taste was still delicious. Stories like these remind us that the heart behind the work matters more than perfection.
And here’s the part most people skip: saving the whey. It’s packed with protein and minerals, perfect for adding to soups, smoothies, or even watering your garden plants. Waste not, want not—a principle that guided homemakers for generations.
Exploring more dairy delights: yogurt and cream cheese
Once you’ve mastered butter and ricotta, yogurt is a natural next step. It’s like setting up a little science experiment in your kitchen, with that satisfying feeling of creating something alive and beneficial for your family’s health.
Warm a half-gallon of milk to 180 degrees Fahrenheit, then let it cool to 110 degrees. Stir in a few tablespoons of plain yogurt with live cultures as your starter. Pour into clean jars and keep the mixture warm—I use a yogurt maker, but wrapping jars in towels and placing them in a turned-off oven with the light on works beautifully too.
After 8 to 12 hours, you’ve got creamy yogurt. For thicker, Greek-style yogurt, strain it through cheesecloth for a few hours. The liquid whey drips out, leaving behind thick, tangy yogurt perfect for breakfast bowls or homemade ranch dressing. Top it with honey from a local farm or berries you preserved last summer.
The truth? Temperature control can be tricky if your home runs cool. One woman shared how she uses her oven’s pilot light for consistent warmth during winter months—a genius tip from our community of homemakers helping each other succeed.
Cream cheese follows a similar fermentation path. Combine equal parts heavy cream and whole milk, heat gently, add a culture starter or lemon juice, and let it set overnight. The next day, strain through cheesecloth until it reaches your desired consistency. It’s richer and more flavorful than store-bought, ideal for cheesecakes, bagels, or frosting homemade cinnamon rolls.
I have to admit, these processes connect me to generations of women who preserved and created foods as acts of love and provision. There’s something deeply satisfying about continuing these traditions in modern times.
Essential tools and ingredients for dairy making
You don’t need a fully stocked professional kitchen to get started, but a few key tools make the process smoother. A good instant-read thermometer is essential for cheese and yogurt making—temperature precision matters when you’re working with cultures and enzymes.
Cheesecloth is your best friend. Buy it in bulk or look for reusable nut milk bags that work just as well and can be washed and used again. A fine-mesh strainer, heavy-bottomed pots that distribute heat evenly, and clean glass jars for storage round out the basics.
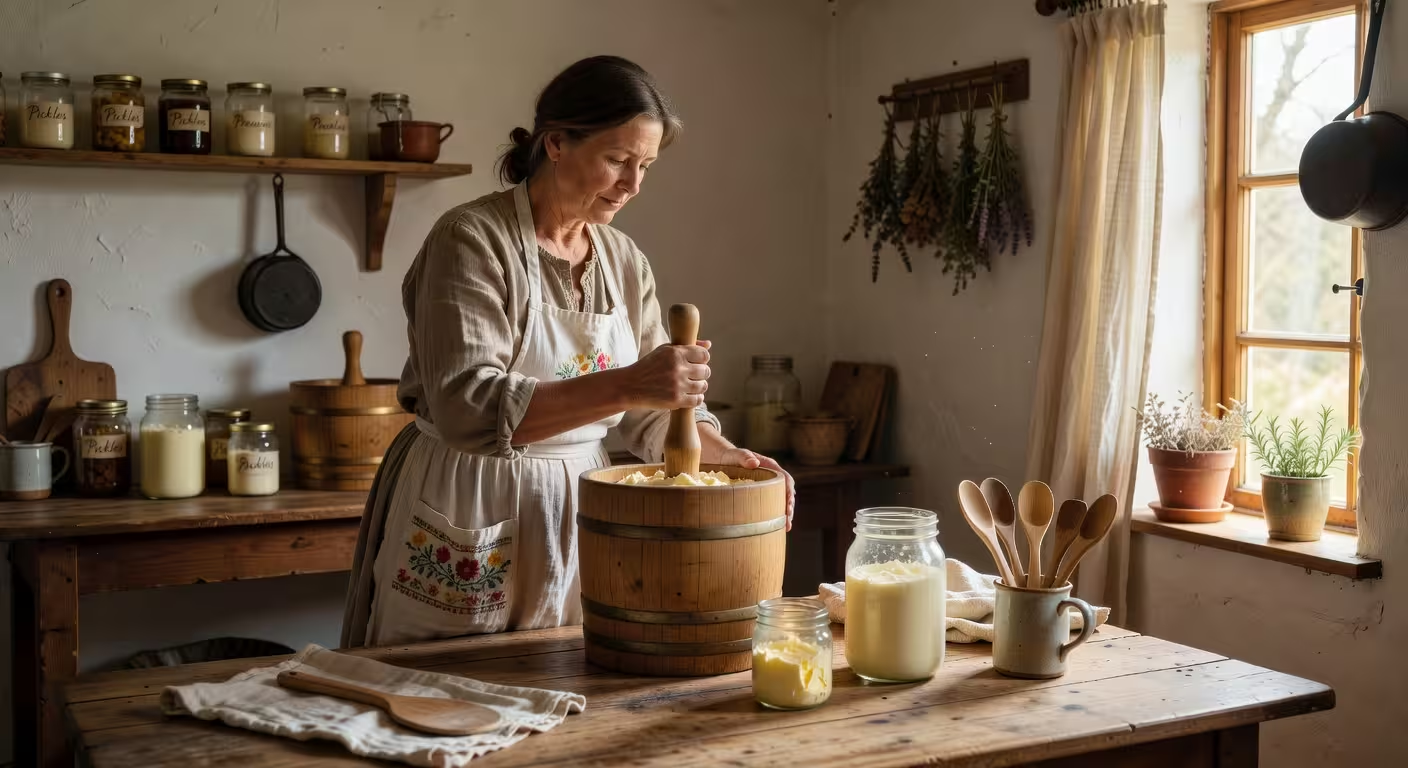
For butter, a wooden churn adds traditional charm if you’re drawn to that aesthetic, but honestly, a stand mixer with a whisk attachment or even a food processor makes quick work of it. The Instant Pot has a yogurt setting that maintains perfect temperature, which many busy homemakers swear by.
Source your milk carefully. Ultra-pasteurized milk, while convenient, won’t curd properly for most cheese making because the high heat changes the protein structure. Look for regular pasteurized milk, preferably from local dairies. Whole milk gives the richest results, though you can experiment with different fat percentages.
One frustration I see women face online is dealing with milk that just won’t cooperate. If you’re having trouble, check the label—choosing the right type of milk makes all the difference. Some homemakers have access to raw milk, which works beautifully but requires careful handling and isn’t legal everywhere.
Between you and me, the key is patience and not getting discouraged by initial failures. Every tradwife I know has stories of cheese that didn’t set or butter that took forever. We learn, adjust, and try again—that’s part of embracing this lifestyle with grace.
Advanced dairy projects: mozzarella and cultured butter
Once you’re comfortable with the basics, mozzarella opens up a whole new world. Fresh mozzarella requires citric acid and rennet, both easily found online or at specialty stores. Heat milk with citric acid, add rennet, and watch it transform into curds. Then comes the fun part—stretching and kneading the warm cheese until it becomes smooth and elastic.
The first time I made mozzarella, I was amazed at how quickly it came together, though my stretching technique needed work. The cheese was delicious but didn’t have that perfect smoothness. By the third batch, I had it down, and now it’s a regular feature on our Friday pizza nights.
Cultured butter takes your butter-making to the next level. Instead of using fresh cream, you culture it first by adding a small amount of buttermilk or yogurt and letting it sit at room temperature for 12 to 24 hours. This develops complex, tangy flavors reminiscent of European-style butter. Then churn it as you normally would.
The flavor difference is remarkable—deeper, more nuanced, absolutely incredible on fresh bread or melted over vegetables. It’s the kind of upgrade that makes you wonder why you ever bought butter from the store.
Hard cheeses like cheddar require aging, which means planning months ahead and maintaining proper temperature and humidity. While I haven’t ventured there yet, several women in our community have dedicated cheese caves in their basements, aging wheels of farmhouse cheddar that would make any homesteader proud.
Overcoming common challenges in dairy making
Every tradwife faces hurdles in the kitchen, and dairy making is no exception. Humidity affects cheese setting—if you’re in a particularly humid climate, you might need a dehumidifier running in your kitchen, or choose drier days for cheese making.
Temperature fluctuations plague yogurt makers. If your house runs cold, find creative solutions: the oven with just the light on, a cooler with warm water bottles, or investing in a dedicated yogurt maker that maintains steady heat.
One ongoing debate in homemaking circles is raw versus pasteurized milk. Raw milk advocates point to superior flavor and natural enzymes. However, safety must come first—if you’re pregnant, have young children, or anyone in your household has compromised immunity, pasteurized milk is the safer choice. Understanding the risks helps you make informed decisions for your family.
Storage concerns come up frequently. Homemade butter lasts about two weeks refrigerated, longer if salted, and freezes beautifully for months. Fresh cheeses like ricotta should be used within a week. Yogurt keeps for two to three weeks when properly refrigerated.
One scenario I’ve witnessed repeatedly: a busy mom attempting yogurt while juggling homeschooling and household duties. The batch over-ferments and turns too sour. Instead of viewing it as failure, she adjusts the timing next round, maybe sets a phone reminder. These stories validate that learning is part of the journey.
Contamination worries some women, especially when working with cultures. Keep everything clean—sterilize jars in boiling water, wash hands thoroughly, and use clean utensils. Most problems stem from improper temperature or timing rather than actual contamination.
Creating a sustainable dairy routine
The key to maintaining homemade dairy production isn’t doing everything at once—it’s finding a rhythm that fits your life. I make butter every other week, yogurt weekly, and cheese when I have time or need it for specific recipes.
Batch your work. When making yogurt, prepare enough for the week in individual jars. Portion butter into usable amounts before freezing. Double ricotta recipes and freeze half for busy weeks when homemade lasagna calls but time is short.
Season your efforts. Summer brings abundant fresh milk from farms. Fall and winter are perfect for cultured projects that benefit from cooler temperatures. Spring might be when you experiment with new cheeses using fresh herbs from your garden.
Involve your family. Children love shaking jars for butter—it becomes a memorable activity rather than just another chore. Husbands often appreciate being included in tasting tests for different cheese batches. These moments build family bonds around nourishing traditions.
Track your successes and challenges. Keep a simple notebook with what worked, temperatures used, and timing notes. This becomes your personal dairy-making guide, customized to your equipment and environment.
Making your own dairy products transforms your kitchen into a place of genuine creation and connects you to homemaking traditions that span generations. Whether you start with simple butter or venture into cultured cheeses, each batch strengthens your skills and deepens your appreciation for real food made with love. Share your dairy-making journey with other like-minded homemakers in our Tradwife Club community, where we celebrate these traditional skills and support each other in creating nourishing homes.
Frequently asked questions
Can I make butter and cheese with store-bought milk?
Yes, most grocery store milk works well for dairy making. Use whole milk for the richest results, and avoid ultra-pasteurized varieties for cheese making as they won’t curd properly. Regular pasteurized milk from any supermarket will give you excellent homemade butter, yogurt, and ricotta.
How long does homemade butter stay fresh?
Homemade butter lasts up to two weeks in the refrigerator when stored in an airtight container. Salted butter keeps slightly longer than unsalted. For extended storage, freeze butter in portions for up to six months, making it easy to pull out just what you need.
What’s the easiest cheese for complete beginners?
Ricotta is hands-down the simplest cheese for beginners, requiring only milk, lemon juice or vinegar, and cheesecloth. The entire process takes about 30 minutes, and it’s very forgiving. Many women start with ricotta to build confidence before moving to mozzarella or other cultured cheeses.
Do I need special equipment to make dairy products at home?
Basic dairy making requires minimal equipment—a good thermometer, cheesecloth, and clean jars. For butter, even a mason jar with a tight lid works, though a stand mixer speeds the process. A yogurt maker helps but isn’t necessary; many homemakers use their oven with just the light on to maintain temperature.
Is homemade dairy actually healthier than store-bought?
Homemade dairy gives you complete control over ingredients, allowing you to avoid preservatives and additives found in commercial products. You can choose high-quality milk, adjust salt levels, and add beneficial cultures. Many women report better digestion and flavor, though anyone with specific dietary concerns should consult their healthcare provider.
How can I flavor homemade butter and cheese?
Add herbs, garlic, honey, or spices after churning butter or making cheese. Fresh herbs from your garden work beautifully—try rosemary, chives, or basil. For seasonal variations, mix in pumpkin spice in fall or lemon zest in spring. Experimenting with flavors makes each batch unique and tailored to your family’s preferences.